


Growing Collard Greens in Arizona: Plant, Harvest and Cook a Heat-Tough Green

If you have ever wished kale were a little tougher, a little more forgiving and a lot more productive, collard greens are the plant for you. Collards are the workhorse of the cabbage family. They shrug off cold nights, they keep going longer into warm spring weather than almost any other leafy brassica, and one healthy plant can hand you a big bundle of leaves every week for months.
In this guide I walk through when to plant collards in the low desert and the high country, which varieties to look for, how to prep the bed, how to water and feed, which pests to watch for, and how to harvest, store and cook what you grow.
Why Collards Belong in an Arizona Garden
Collards are the same species as kale, cabbage and broccoli, but they were selected for big, flat, smooth leaves instead of heads or florets. That simple leaf form is part of what makes them so tough. They do not have to build a tight head before you can eat them, so you start harvesting early and keep harvesting for a long time.
Here is what I love about them in our climate:
Heat tolerance. Collards handle warm days better than kale, cabbage or lettuce. They will not love a 105-degree afternoon, but they hang on through the warm shoulder weeks of fall and spring when other greens fade.
Cold tolerance. Established plants take frost in stride and usually survive dips into the low 20s.
Long harvest window. You pick the lower leaves and let the plant keep growing from the top. A fall planting can feed you from November into April or May.
When to Plant Collards in Arizona
Timing is the first big decision, and it depends on where you live.
Low desert (Phoenix, Tucson, Yuma and areas below about 3,000 feet). Collards are a fall and winter crop here, with a little stretch into spring. Start seeds in trays from about mid-August through October, or direct sow from September through November once daytime highs settle under the mid-90s. Transplants can go in from late September through January. If it is late October as you read this, you are right on time for transplants.
Middle elevations (Prescott, Payson, Sierra Vista, Sedona). You get two windows. Plant in late summer for a fall harvest that often carries through winter with a little frost protection, or plant in early spring as soon as the soil can be worked for a harvest into early summer.
High country (Flagstaff, Show Low, the White Mountains). Treat collards as a spring and summer crop. Start seeds indoors four to six weeks before your last frost, transplant once hard freezes are past, and harvest all summer. A midsummer sowing can also give you a fall crop that keeps going after the first frosts.
Collards take about 60 to 80 days from transplant to a full-size harvest, but you can start picking young leaves much sooner than that.
Varieties to Look For
There are not as many collard varieties on seed racks as there are kales, but the ones you will find are dependable. Here are some worth trying:
Georgia Southern (also sold as Creole) is the classic old-time collard. It is tall, vigorous and very tolerant of both heat and poor soil.
Vates is a compact, slow-bolting variety with dark leaves. It is a great choice for raised beds and holds well into spring.
Champion is an improved Vates type that stays productive a little longer before bolting.
Flash and other hybrid types are uniform, fast and slow to bolt, which helps in the low desert spring.
If you can only find one, grab whatever is on the rack. Collards are forgiving, and almost any variety will perform in an Arizona winter garden.
Starting Seeds or Buying Transplants
Collard seeds sprout quickly in warm soil, usually in four to seven days. In the low desert I like to start them in trays or soil blocks in September and October, because the young seedlings are easier to protect from heat, birds and pill bugs when they are on a bench instead of in the ground. If you have never tried soil blocks, my guide to https://www.greenthumbhobbies.com/post/diy-soil-blockers shows how to make them, and https://www.greenthumbhobbies.com/post/diy-newspaper-seed-pots is another easy, free option.
Sow seeds a quarter inch deep, keep the mix evenly moist, and give seedlings plenty of light so they do not stretch. They are ready to transplant when they have four or five true leaves, usually four to six weeks after sowing. Harden them off for a few days in morning sun before they go into the garden.
Preparing the Bed
Collards are heavy feeders, and the leaves get big, so give them a rich bed and some room.
Sun. Full sun is ideal in winter. In the low desert, a spot with a little afternoon shade helps early fall and late spring plantings get through warm spells.
Soil. Mix two to three inches of finished compost into the top eight inches of soil. Our native soils tend to be alkaline and low in organic matter, so compost is the single best thing you can add. If you make your own, a https://www.greenthumbhobbies.com/post/diy-compost-sifter helps you get a fine, even mix.
Fertilizer. Work in a balanced organic fertilizer at planting time, following the label rate.
Spacing. Set plants 18 to 24 inches apart in rows two to three feet apart. In a raised bed, a staggered grid with about 18 inches between plants works well.
Watering and Mulching
Consistent moisture is the secret to tender, mild collards. Stressed plants turn tough and bitter.
In the low desert during fall and spring, plan on watering deeply every two to four days depending on temperatures, wind and your soil. In the cooler weeks of December and January, every five to seven days is often enough. Water to a depth of about a foot so roots grow down, not just along the surface. Drip lines or soaker hoses work best, because they keep water off the leaves and cut down on disease.
A two to three inch layer of mulch, such as straw, shredded leaves or wood chips, keeps the soil cooler, slows evaporation and reduces weeds. Keep mulch an inch or so away from the stems.
Feeding Through the Season
Because you are harvesting leaves over a long season, collards appreciate a light, regular boost of nitrogen. I side-dress with compost or a balanced organic fertilizer about a month after transplanting and again every four to six weeks after that.
Pests and Problems
Collards are generally tough, but they share pests with the rest of the cabbage family. The good news is that the big leaves can usually handle some damage while you get things under control.
Cabbage loopers and imported cabbageworms. Green caterpillars that chew holes in the leaves. Hand-pick them, check the undersides of leaves, and use row covers early in the season. Products containing Bt (Bacillus thuringiensis) target caterpillars specifically.
Aphids. Gray cabbage aphids cluster on new growth and leaf undersides. Knock them off with a strong spray of water, encourage ladybugs and lacewings, or use insecticidal soap if they get heavy.
Whiteflies. These are a common nuisance in the low desert during warm weather. A hard water spray and yellow sticky cards help, and populations usually drop once nights get cold.
Bolting. As days lengthen and heat arrives in spring, collards send up a flower stalk. The leaves get smaller and stronger flavored. Once that happens, harvest hard and pull the plant, or leave a few flowers for the bees.
A simple set of hoops with frost cloth or insect netting does double duty in winter. It keeps caterpillars and flea beetles off and protects plants on the coldest nights. My guide to https://www.greenthumbhobbies.com/post/diy-row-cover-hoops shows how to build them from inexpensive materials.
How to Harvest Collards
You can start picking collards as soon as the leaves are big enough to use, usually about a month after transplanting. Young leaves, about the size of your hand, are tender enough for salads and quick sautés. Full-size leaves, 10 to 12 inches long, are perfect for braising.
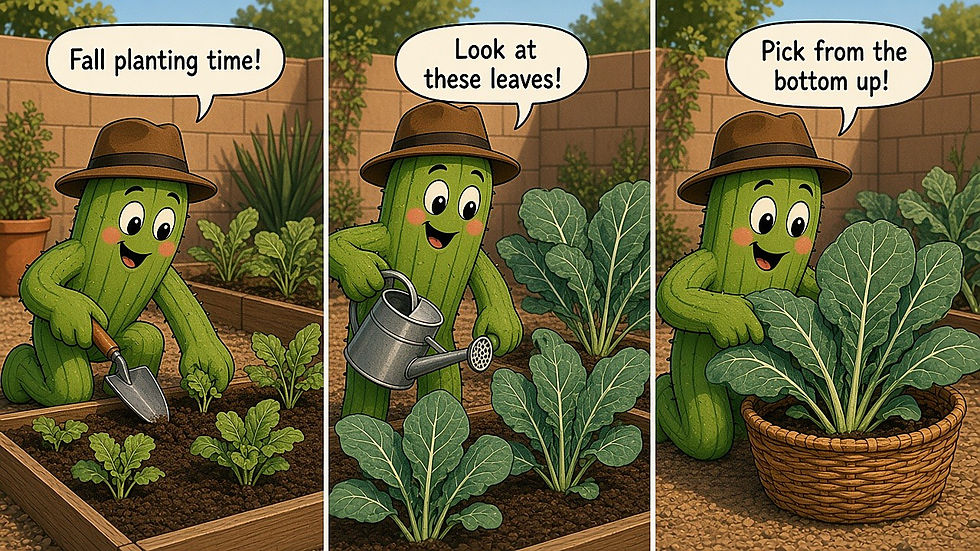
The trick to a long harvest is to pick from the bottom up. Snap or cut the oldest, outer leaves at the base of the stem, and always leave at least six to eight leaves at the top so the plant can keep growing. Over time the plant turns into a little palm tree with a bare stalk and a crown of leaves on top. That is exactly what you want.

Cleaning and Storing
Collard leaves can hold grit, especially after a windy week, so give them a good wash. Swish the leaves in a sink of cool water, lift them out, and repeat until no sand settles at the bottom.
To store, pat the leaves dry, wrap them loosely in a towel, and keep them in a bag in the refrigerator. They will stay fresh for about a week, often longer.
For long-term storage, collards freeze well. Strip the leaves from the stems, cut them into ribbons, blanch in boiling water for about three minutes, cool in ice water, drain well, and pack into freezer bags. Frozen collards are perfect for soups and braises.
How to Cook Collard Greens
The classic way to cook collards is low and slow, and it is classic for a reason. But they are also great quick-cooked or even raw when the leaves are young. Here are a few ways I use them.

Slow-braised collards. Strip the leaves from the stems and cut into ribbons. Brown a little bacon or smoked turkey with onion and garlic, add the greens, a couple cups of broth, a splash of vinegar and a pinch of red pepper flakes. Cover and simmer for 45 minutes to an hour until silky.
Quick garlic sauté. Slice the leaves into thin ribbons, then sauté in olive oil with garlic for five to eight minutes until bright green and tender. Finish with lemon juice and salt. This is my weeknight go-to.
Collard wraps. Shave down the thick center rib, blanch the leaf for 30 seconds, and use it in place of a tortilla. Fill with rice, beans, roasted vegetables or grilled chicken.
Companion Plants and Garden Planning
Collards fit nicely into a fall and winter bed with other cool-season crops. They pair well with onions, garlic, beets and carrots, and dill or cilantro nearby draws in beneficial insects that help with aphids.
If you like collards, you will probably also enjoy growing their cousins. My guides to https://www.greenthumbhobbies.com/post/kale-arizona, https://www.greenthumbhobbies.com/post/mustard-greens-arizona and https://www.greenthumbhobbies.com/post/swiss-chard-arizona cover three more easy greens that thrive in the same season, and https://www.greenthumbhobbies.com/post/broccoli-arizona is a great next step in the cabbage family.
Final Thoughts
Collards are one of those crops that make you feel like a better gardener than you really are. They forgive a missed watering, they survive a cold night, and they just keep producing. A short row planted this fall can keep you in greens all winter and well into spring, and once you have had a pot of homegrown, frost-kissed collards, the grocery store bundles will never taste quite the same.
Happy growing!


Comments